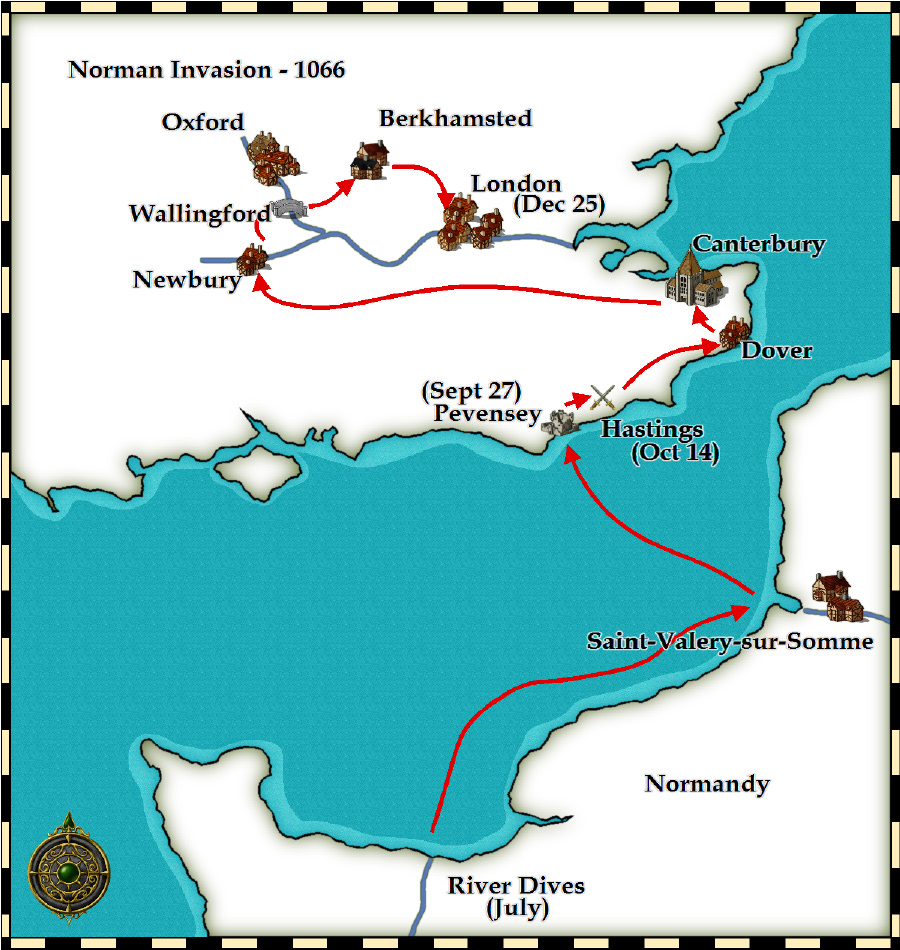
William the Conqueror's Invasion Route
This map shows the route of William the Conqueror in late 1066 as he invaded and took control of England. William first moved his invasion fleet from the River Dives in Normandy to St. Valery.
When the conditions were suitable for a crossing William sailed his fleet across the English Channel. The fleet landed at Pevensey without opposition and William defeated Harold at the Battle of Hastings. Dover was the next target as William needed the important Channel crossing point. Canterbury fell and William marched to London. He was forced back and marched around London via Newbury and Wallingford to Berkhamsted. Here the Archbishop of York and the Earls met William and accepted him as their new king.
Interactive map of William the Conqueror's invasion route.
Open the panels to see the route William took.


More maps
Map Index Page
Saxons and Angles
Invasion RoutesAreas Controlled in 550
Kingdoms in 7th Century
England in 1065
Vikings
Viking Invasions
William the Conqueror
Key battles in 1066Invasion of England
Possessions in 1087
By Date
Invasion France (1346)Invasion France (1415)
War of the Roses
Battle Maps
Locations by Area
Area map - North WalesArea map - Wales
Area map - South East
Area map - East
Area map - South West
Area map - North
Area map - Scotland Central
Area map - Scotland North
Area map - Midlands
Area map - South